The discus was by far the hardest animal in this book to draw. I drew two of them because they are schooling fish,one from the front and one from the side. While they are not hard to draw outline wise, they are extremely colorful and detailed fish. I will be showing you how to draw a discus from the front, because that side has a relatively less detailed color scheme and the other one took me several days of drawing and re-drawing till I was screen-sick to get all the markings exactly the way I wanted them to look. Needless to say I drew the second one from the front, both to get across how ridiculously thin this fish is and to be able to use a simpler color patterning and get the point across. Here’s how to draw that version.
Step 1:
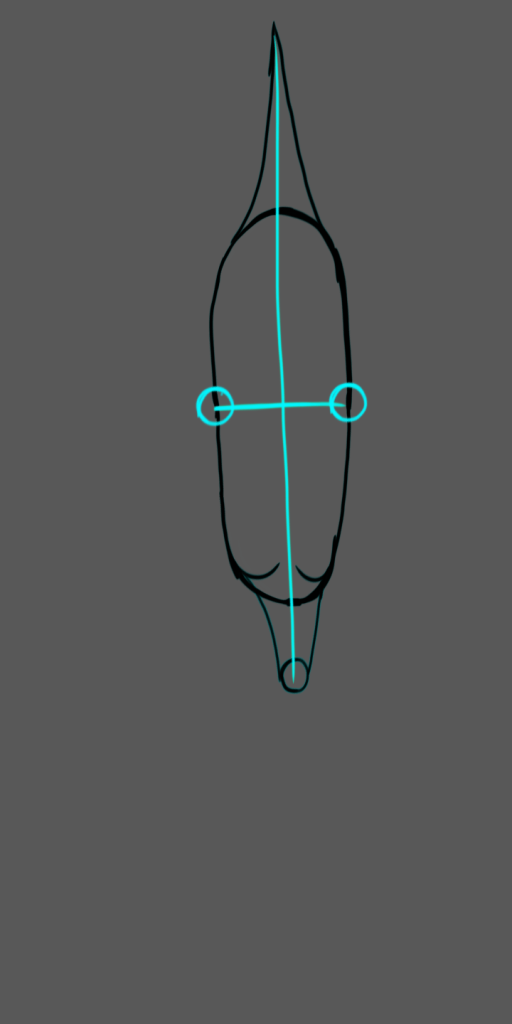
First let’s draw an oval three times taller than it is wide. We’ll call the width 1 unit, so make sure you know how long that is because we’ll be using it to measure the proportions of the rest of the fish.

Step 2:
Next we’ll draw a V shape at the top of the body that is 1&1/2 units tall. At the bottom of the fish we’ll make two curves that almost meet at the center but not quite.

Step 3:
Next, we’ll draw a 1/4 unit diameter circle, 1/2 units from the bottom.

Step 4:
Its a good idea to draw a cross down the horizontal and vertical centers. Make it either lightly drawn or on another layer. At either end of the middle line draw 1/3 unit diameter circles.
Step 5:
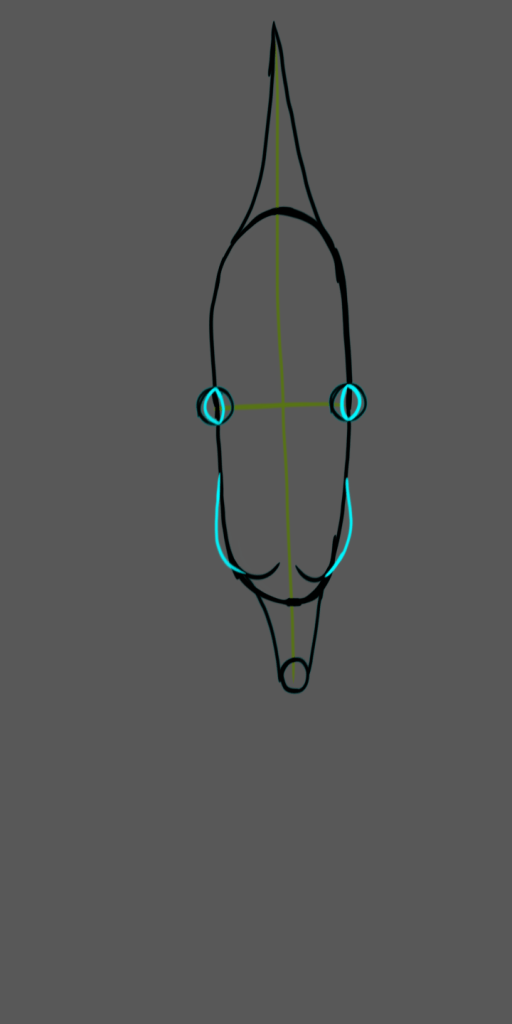
On the inside of the eye, draw a slight curve down the center, curving towards the center. Then shave off just a little from the outer curve.
Draw curves off the two curves at the bottom to give the fish cheeks.
Step 6:
Erase the lines that separate the fins from the rest of the fish, inside and outside the eye, and clean up the cheeks.

Step 7:
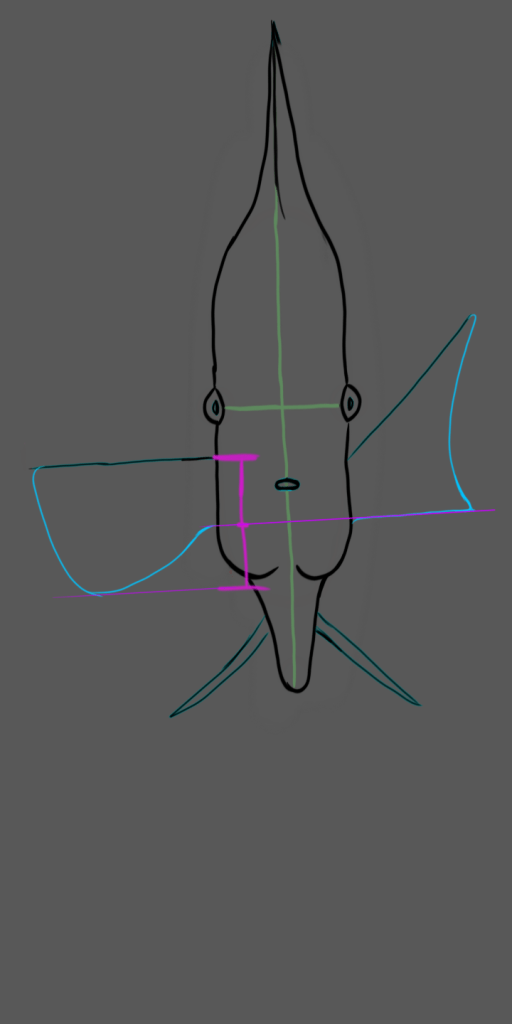
Inside the eye draw a smaller version of the eye shape. about 1/2 unit down from the center of the face, draw an oval that is the mouth.

Step 8:
The fins start about 3/8ths of a unit down from the midway point on the fish. The top of the fin is a straight line about 1&1/2 unit long. Draw the fin on the left perpendicular to the fish and the one on the right on 45 degree angle upward because discus tread water by making a figure eight motion with their fins.
At the bottom of the fish make the feelers by making an acute V shape about 1 unit long.

Step 9:
The bottom of the fin start 1/2 unit down from the top of the fin. For the left fin, start a curve from there and curve down until it reaches 1 unit from the top of the fin, then curve back up to meet it at the end. It should be a little more boxy then round.
The bottom of the right fin should go straight out till it’s even with the top part, and then be connected with an inwards curve, which will give it a forward motion.
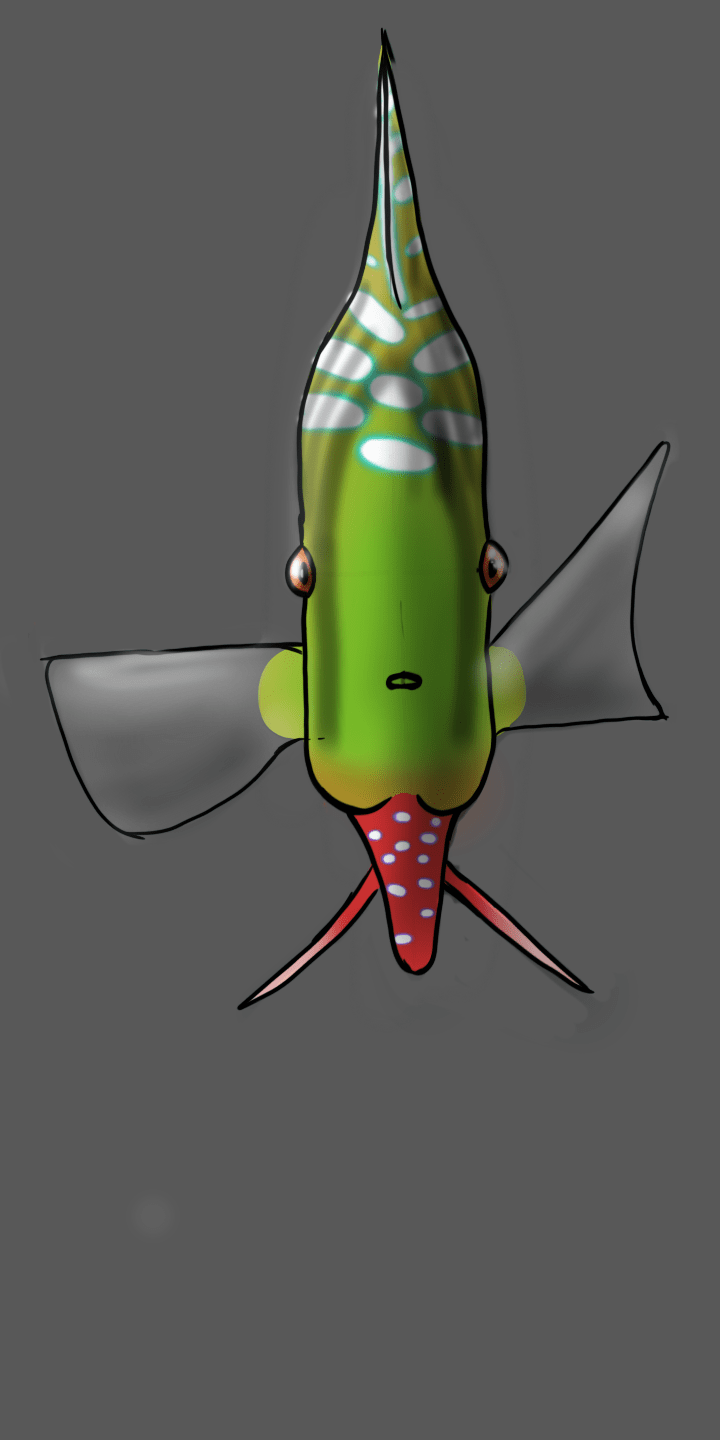
Step 10:
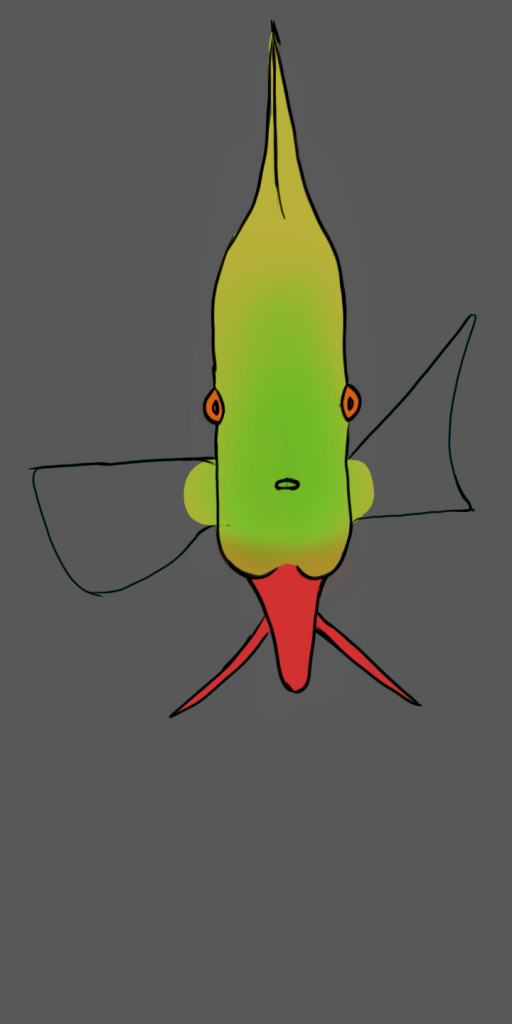
To start the base color of this fish is yellow on top, and red at the bottom. There should be a little orange faded at the bottom of the cheeks and in the eyes.

Step 11:
The face of the fish should be slightly neon green.
Step 12:
Now we add the backgrounds of the spots and fins. The spots are going to end up mostly white, but these colors should end up along the edges of the white spots and this is the easiest way to get that effect. The top spots should be cyan ovals, the bottom spots should be smaller circular purple ones.
The fins are a light grey, however they are clear in real life so if you have a background simply make it greyer and blurrier behind the fins.
Finally fade the end of the feelers to white.


Step 13:
In the center of the dots create a white spot. Don’t fully get rid of the color below.

Step 14:
Along the sides and curving to the center, draw a thick dark line. Behind that a thinner dark line curving from the edge to near the center on either side. Behind that, a slightly thinner dark curve.
Fill in the pupils black, and add white highlights on each of them. You can make the highlights different on either side if you want.

Step 15:
Add the shading. The fins are curved one away and one towards you, but because of their transparency it looks better if you make the tops lighter than the bottoms for both. Fish are of course wet, but because they are underwater, the eyes are the only parts that need to have strong highlights. Make sure they match the highlights on the pupils.

So that’s how you draw a Discus!
While the discus isn’t my favorite animal of all time (that honor goes to the okapi), between the colorful drawing I spent so much time on and the soft sounding poem inspired by it, the discus page is one of my favorites in the book.
