After showing the baby cassowary last week I figure it’s time to show how to draw it’s parents. They’re so different from the babies it’s hard to believe they’re the same creature. Let’s begin!
Step 1:
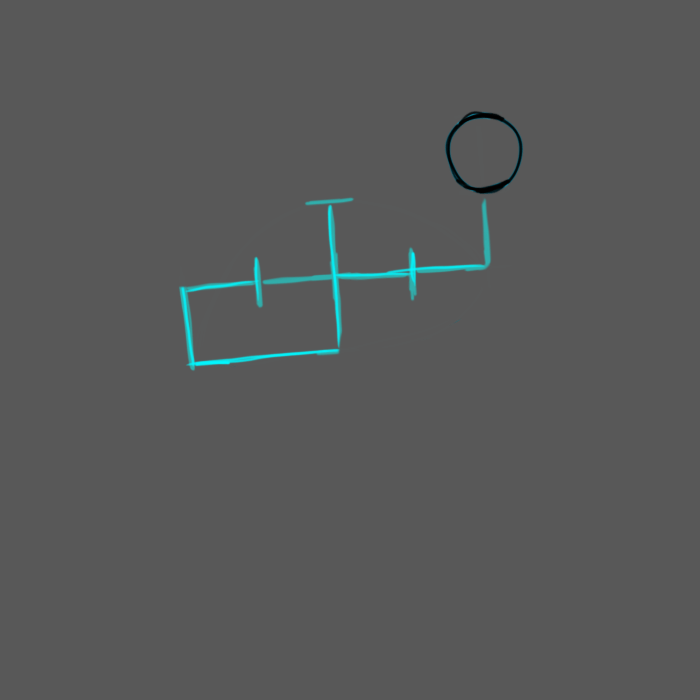
We’ll start with a circle and base the proportions off of the diameter of that circle. We’ll call the diameter of the circle 1 unit, so make sure you know how big your circle is. Next we’ll be drawing some guidelines, so make sure to either draw them lightly or on another layer. Then straight down from the circle, we draw a line 1 unit long. 90 degrees to the left we’ll draw a line 4 units long, and perpendicular to that in the center we’ll draw a 2 unit long line. Connect the bottom and left lines to form a rectangle in the bottom left corner.
Step 2:
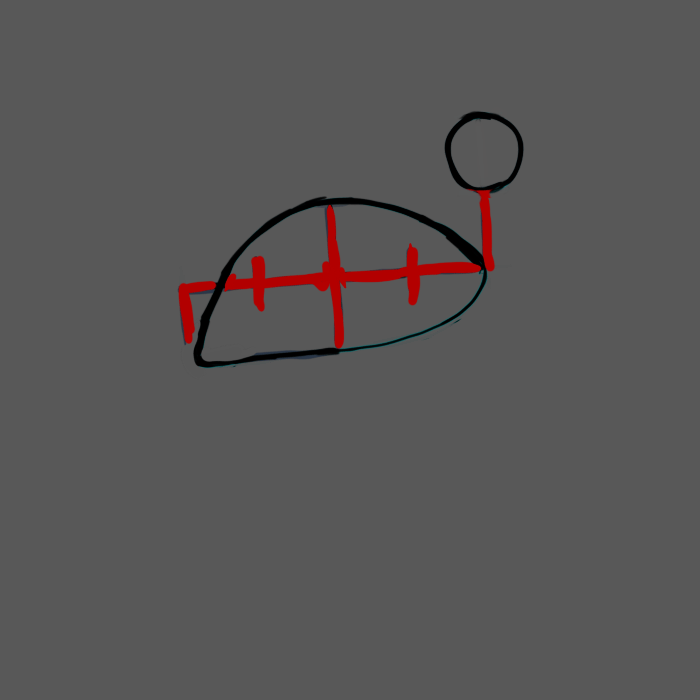
Draw a curve from the corner below the head, going through the top of the guiding cross, and ending at the lower left corner.

Step 3:
Erase the sharp corner at the rectangle and make it a curve, then connect the bottom line to the beginning of the first curve with another curve.

Step 4:
Erase the guidelines.
Step 5:
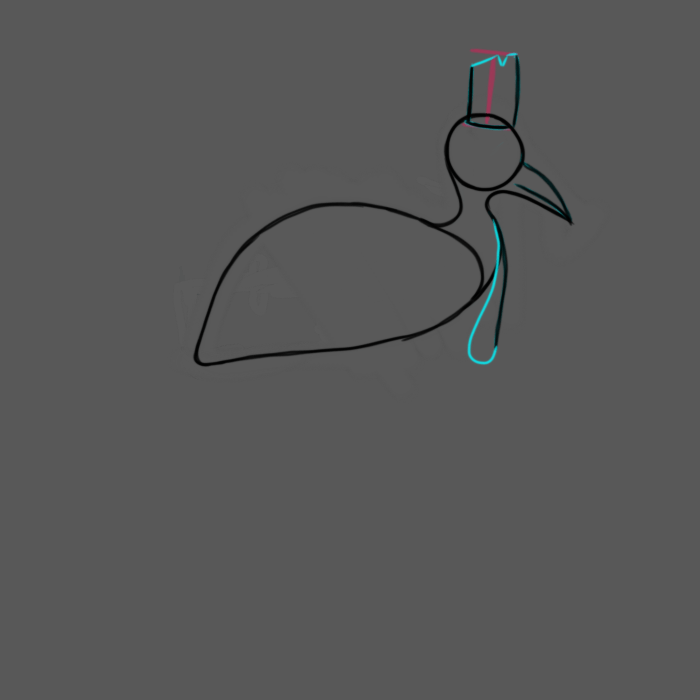
Connect the head to the body with a curve for the back of the neck. For the front of the neck and bottom of the beak; start 1 unit away from the head then draw a distorted S shape that connects the head and the neck. Make sure the bottom of the S curves forwards enough that there’s room for the wattle to hang, but not so much that it looks broken or ungraceful.

Step 6:
Now let’s draw the face details.
For the beak, simply connect the bottom of the beak to the head in the center of the head, then draw a line that follows the bottom of the beak nearly to the head.
For the crest, draw a line almost at the front of the head 1 unit tall. Then draw a slightly curved line straight back, and where that meets the head draw another line straight up that is slightly shorter than the first.
To start the wattle, draw a line hanging straight down from the neck.

Step 7:
To complete the wattle, make it a teardrop shape with the tail reaching back up the neck a little bit more than where you first connected the wattle.
For the crest, start at the shorter back line of the crest and draw a diagonal to a point halfway between the front and back of the crest at the same height as the front line. Then draw a little v shape to a point halfway between that and the front. Lastly draw a straight line from to end of the V to connect to the front.
Step 8:
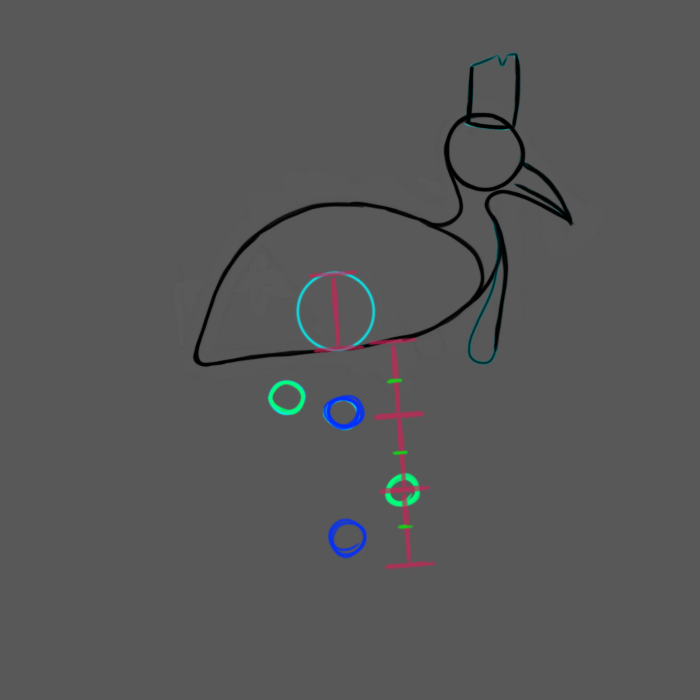
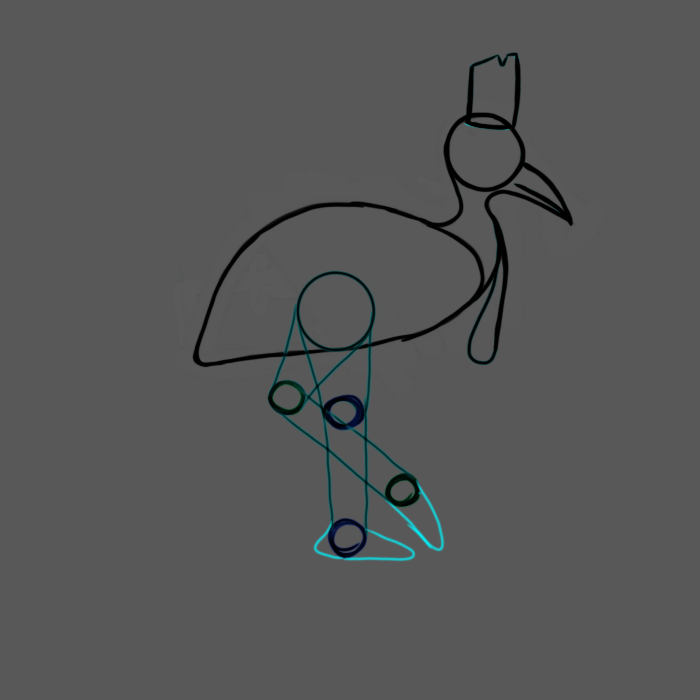
The legs are a little tricky because it is hard to keep track of which circle belongs to which leg, so I’ve color coded them. You can also repeat this step and step 9 twice, doing only one leg at a time. One leg should be straight and one should be bent.
Start by drawing a 1 unit diameter circle at the bottom middle of the body to make the hip.
Then for each of the knees draw 1/2 unit diameter circles where the center is about 1 unit away from the edge of the hip circle.
Then for the ankles draw a 1/2 unit circle with the center about 1.5 units away from the center of the knee.
Step 9:
Connect the knees to the hip and their corresponding ankles.

Step 10:
To make the foot on the ground draw a short heel and a longer toe, 1 unit long in total.
To make the foot off the ground draw just the toe part, slightly less than a unit.
Step 11:
Cassowaries only have two front facing toes, so we only have to add one toe behind the first.

Step 12:
Erase all the interior lines and make sure it’s clear which leg is in front. Lightly erase the bottom of the body, but keep track of where it is, as we will be replacing this straight line with a different type of line in the next step.

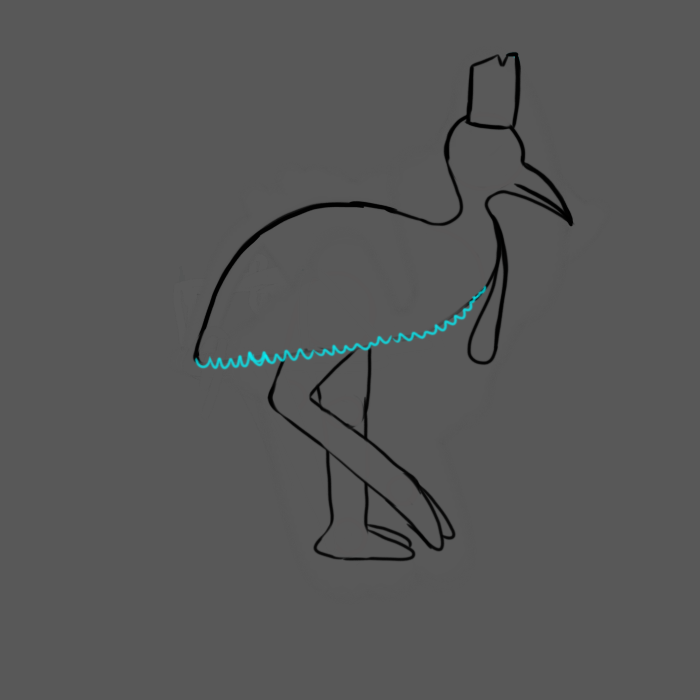
Step 13:
Along where the bottom of the body used to be, draw a scalloped line to indicate shaggy feathers. The feathers are not stiff flight feathers, but droopy and fuzzy like an ostriches feathers or even like fur, so make sure they all point down. Clean up the line with your eraser when you’re done to get rid of any traces of the smooth line or slip ups.
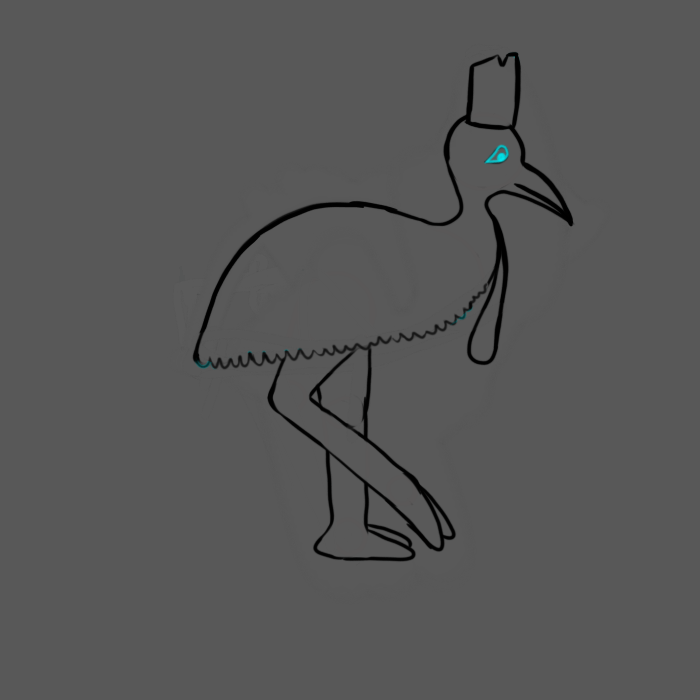
Step 14:
To draw the eye, make a teardrop shape with the tip facing towards the neck, then fill in a dot for the pupil. If you want to add emotion, the top of the eye can be a angled or curved differently as if it were an eyebrow.
Step 15:
To begin coloring we will color the body black and the head blue. The head has no feathers, so make the line between the head and neck curvy or scalloped to give the illusion of scruffy neck feathers.
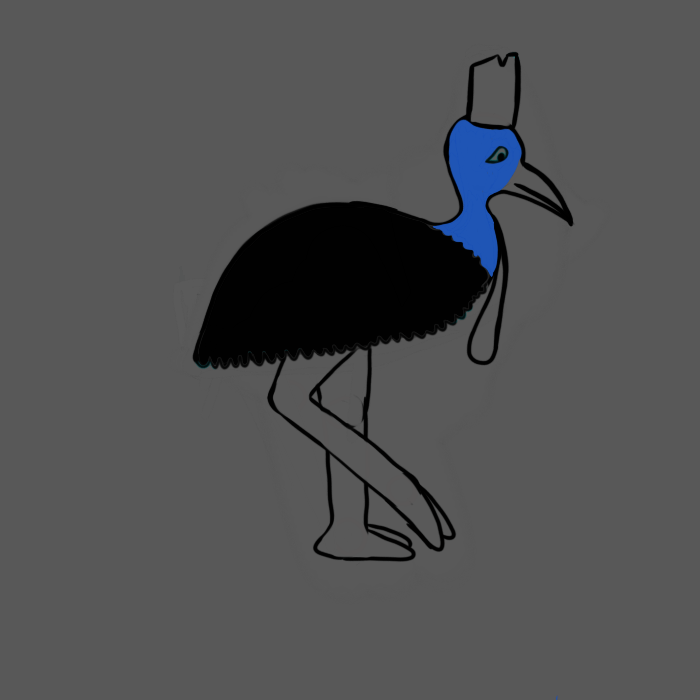
After that add yellow to the beak, eye, crest and legs. Color the wattle red.
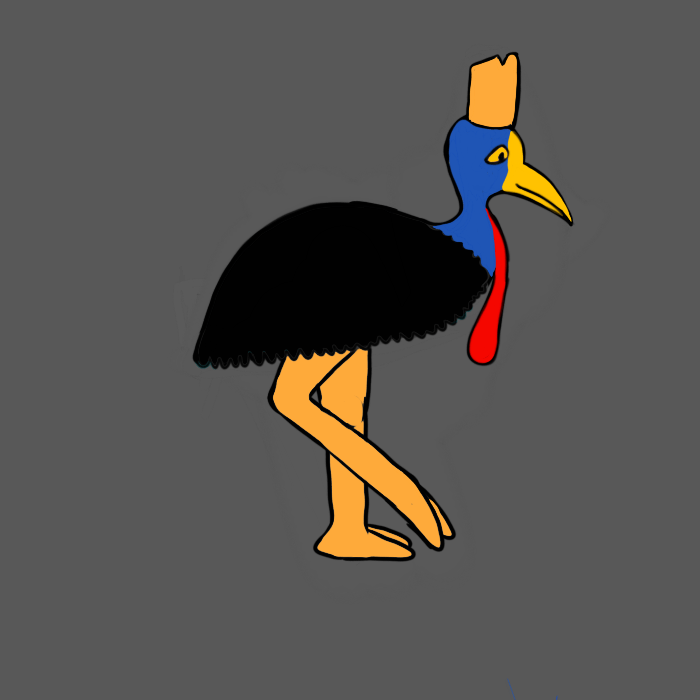
Step 16:
Add shading.

That’s how you draw a Cassowary!
While this was extremely fun to draw when writing the book, this was one of the only animals where I wrote the poem before I drew the picture. Most of the poems I wrote after and slightly inspired by the pictures, but this was the other way around. While the poem focused on their dinosaur-like behavior (because who doesn’t love dinosaurs!), I decided to contrast that by showing the other side of them as a peaceful family playing together.
