
The Zebra is very similar to the horse, but just a bit more bony and a lot more stripy. Here’s how to draw that sassy zebra that hangs out on the last main page of the book!
Step 1:
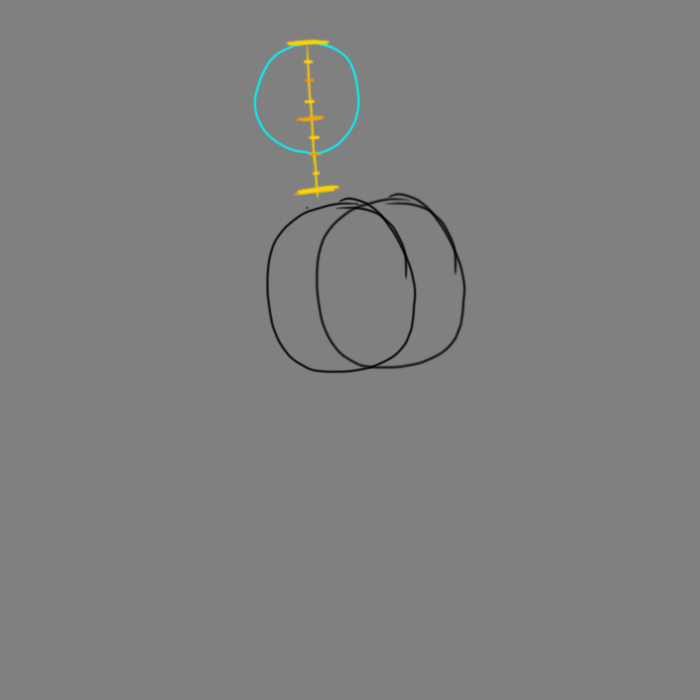
Start by drawing a circle. This will be the chest. Make sure you know the diameter of the circle, we will use it to determine proportions for the rest of the drawing. We will call the diameter 1 unit.

Step 2:
Make a second 1 unit circle, offset 3/8ths of a unit to the right from the first.

Step 3:
Make a 3/4ths of a unit diameter circle with the bottom 3/8ths of a unit above the top of the chest circle.
Step 4:
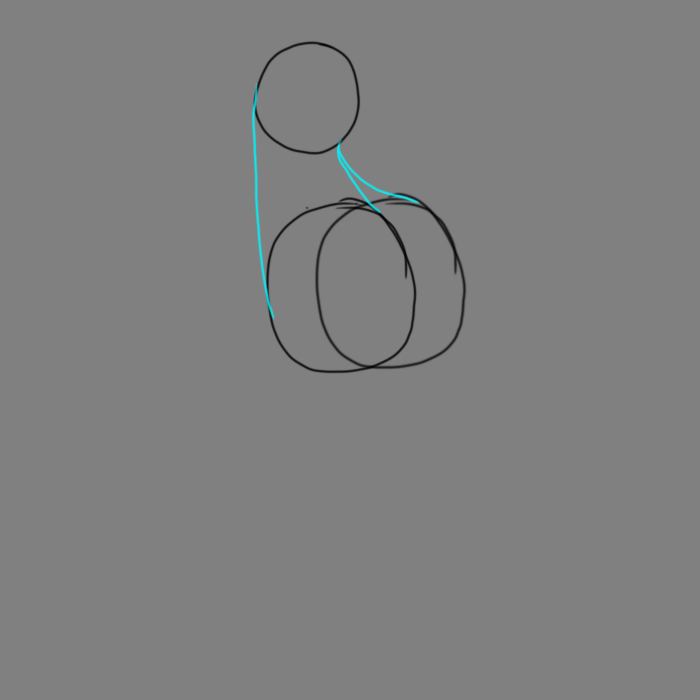
Connect the left of the top circle to the left of the left bottom circle, and the bottom right of the top circle to the top right of both bottom circles.
Step 5:
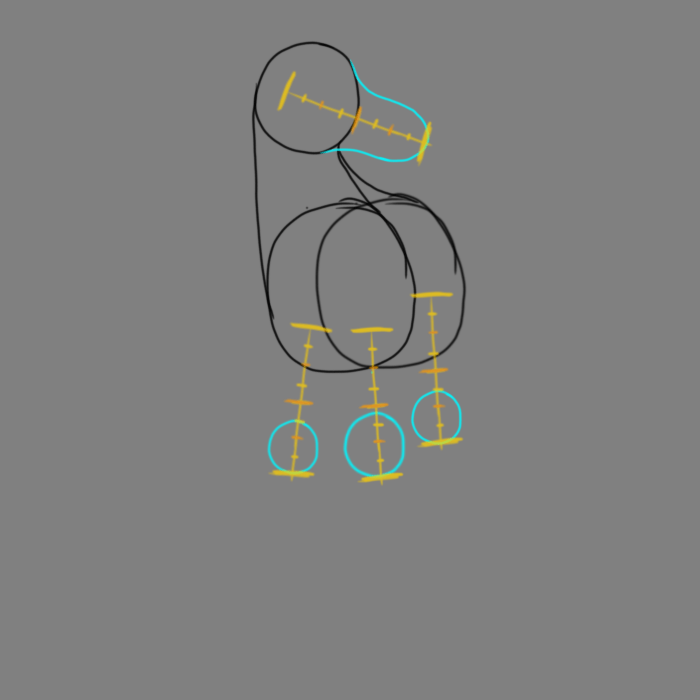
Draw a 1/2 unit oval-ish bump out from the head to make the nose.
You’ll draw three different circles under the body to make the knees. The leftmost one has a 3/8ths of a unit diameter, and is 3/8ths of a unit below the body. The middle circle should have a diameter somewhere between 3/8ths and 1/2 of a unit and the bottom edge should be at the same height as the previous knee. The right circle should be 3/8ths of a unit in diameter and the top edge should be 1/4th of a unit from the body.
Step 6:
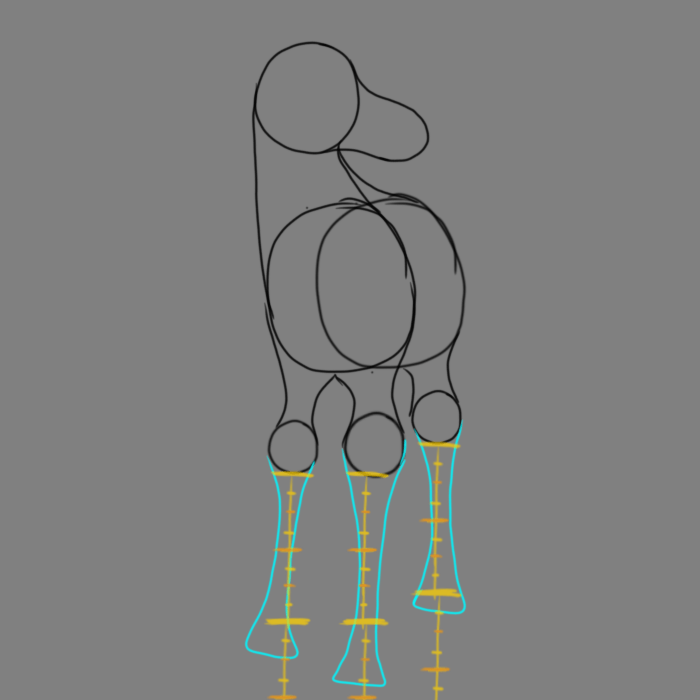
Connect the left two knees to the left body circle, then connect the right knee to the right body circle. They should not overlap.

Step 7:
From each of the knees draw a trumpet shape. The left one should be 1 & 1/4th units long, the middle 1 & 3/8ths, and the right 1 & 1/8th units long.
Step 8:
Starting at the knee of the middle leg, draw an L shape (basically half of the trumpet shapes we did last step), that is 7/8ths of a unit long.
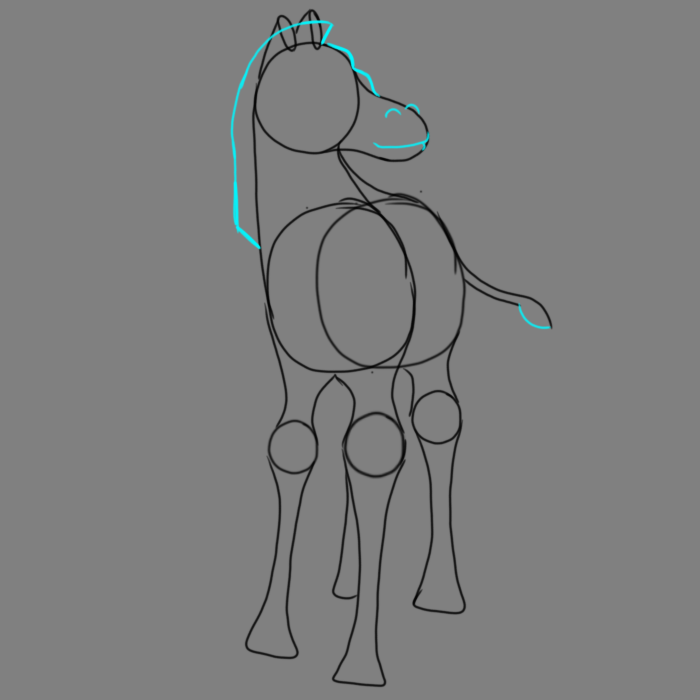
Next, begin the tail by drawing a shallow s shape off the rump. raw the ears by making two 1/4th of a unit long ovals that start just barely below the top of the head.

Step 9:
Connect the left ear back to the head, and make a similar curve off the other ear until it hits the first.
On the tail, make a parallel curve about 3/4ths of the way down the tail.

Step 10:
Draw a curve from the tip of the tail to the unconnected end of the parallel curve. It should make a paintbrush shape.
To make the mane; draw a short line from about 1/8th of a unit above where the left side of the neck connects to the body, at about a 45 degree angle. Then, from the front of the ears, draw a second short line of about the same length and angle. Draw a curve parallel to the neck/head between the tips of these lines.
Starting after the mane, draw two bumps along the outline. One for the forehead, and one to house the right eye.
To make nostrils; draw two half circles, one on the outline of the nose, and the other to the left and slightly below the first.
For the mouth, draw a Y shape that is mostly tail with the forked end connected to the outline of the face. The end of the tail should curve up to make a smirk.
Step 11:
Erase the circles, except under the chin and a bit extended from the right front leg. Erase anything behind the mane and ears, as well as the bit in front of the lips and the bits under the bumps and nostril.

Step 12:
Draw two sideways S shapes where the eyes will be.

Step 13:
Draw a half circle under the upward curve of the S. Above that, draw eyelashes.

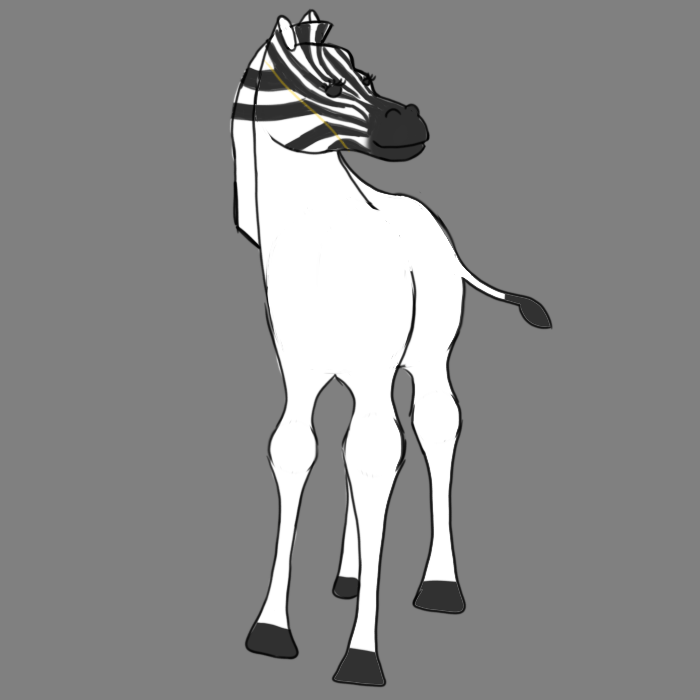
Step 14:
Now we begin to color. We’ll start with a white base, because turns out there is more white on a zebra than black. On the nose, hooves, tip of the tail, and inside the eyes, color it dark grey.

Step 15:
All zebras have different stripes, so there’s a lot of freedom on this next section, but the direction of the stripes tends to be consistent so I’ll detail that next:
Imagine (or very lightly draw) a diagonal line from where the chin bumps inward to your best estimate of where the back of the ear is. Radiating out from the nose, draw a series of not quite straight stripes to the edge of the head/that imaginary diagonal line. If there is too big a gap or if you feel like it you can make a branched stripe or create a stripe that doesn’t go all the way to the nose. (for example just above the left eye, I did one that’s both.) Branched stripes should always branch going away from the nose.

Step 16:
Where the stripes touch the imaginary diagonal line, continue the stripes at a different angle: radiating out to the edge of the head. You can also create branches on stripes that are near it to fill space at the top. These stripes should be a little thicker.
Step 17:
Under the chin draw a stripe that bulges in the center of the neck. Under that, draw pairs of triangle stripes on either side of the front all the way down to the knees. (You may need to extend an imaginary line between the right leg and the neck.)
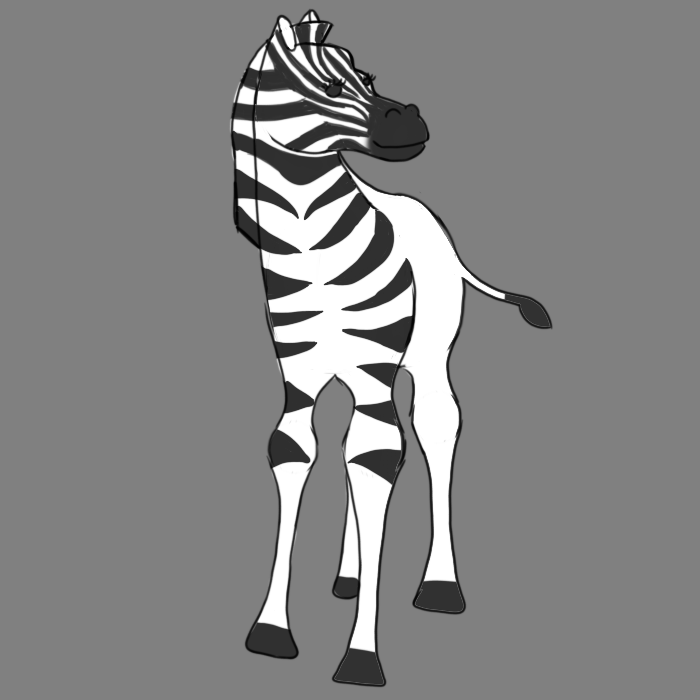
Step 18:
Straight up and down stripes should be drawn between any stripes that don’t have a line between them and the back and the back. Branch the bottom stripe, continuing down to meet with the outside of the leg.

Step 19:
Fill the rump with a series of triangle stripes of varying lengths pointing inward. You can branch some of them if you’d like. Make sure it is evenly filled.

Step 20:
Draw stripes of varying thickness across the legs and tail. On the legs, vary the thickness across the stripes, thick at one end thin at another. Most of the time the edges of the white spaces should be roughly (very roughly) parallel, but you should have a few exceptions. You can branch some or add triangle stripes to vary things.

Step 21:
Shade the zebra.

So that’s how you draw a Zebra!
This finishes up the behind the scenes on how I drew these animals! I was proud of this page because of how well the zebra’s smug expression fits the poem on the other side. I also like to think that the zebra is inviting the reader on to the facts section of the book just behind it!
