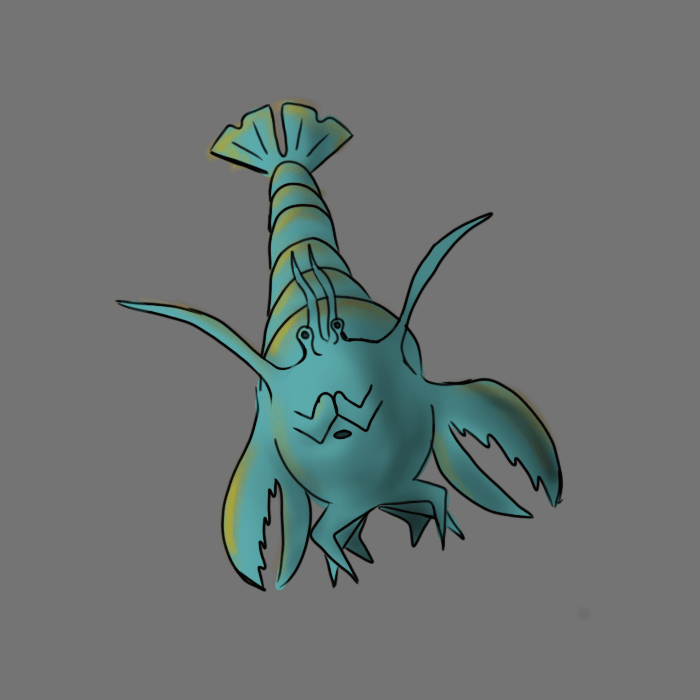
Yabbies are a type of blue crayfish, native to Australia. As far as shape goes, they’re similar to any crayfish or lobster, but blue. Here’s how to draw a Yabby like I did on the Y page of the book!
Step 1:
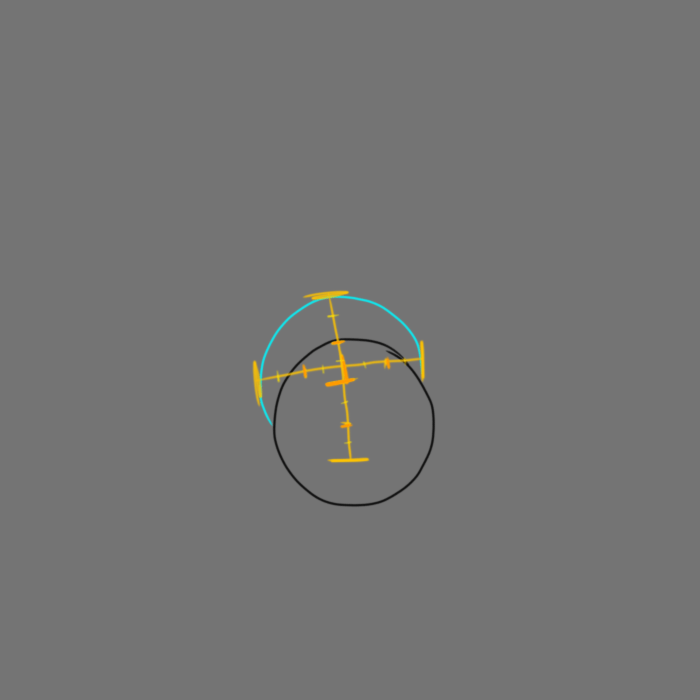
Draw a circle. Make sure you know the diameter of this circle, we will call that distance 1 unit.

Step 2:
Draw a curve that’s pretty much the same curve as the circle, with the top 1/4th unit away from the top of the circle.
Step 3:
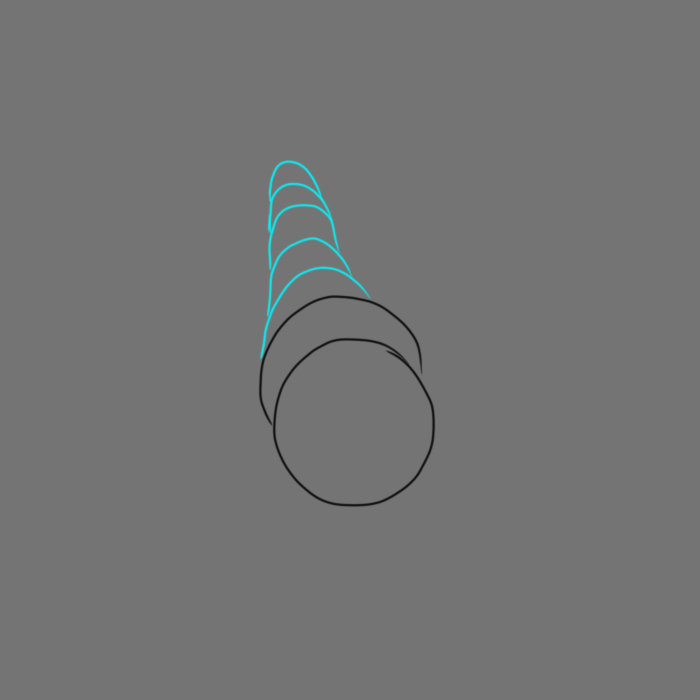
Starting on top of the first curve, draw five curves on top of one another. They should be close to half circles but you don’t have to be precise. They should get slightly smaller each time, but connect somewhat smoothly.
Step 4:
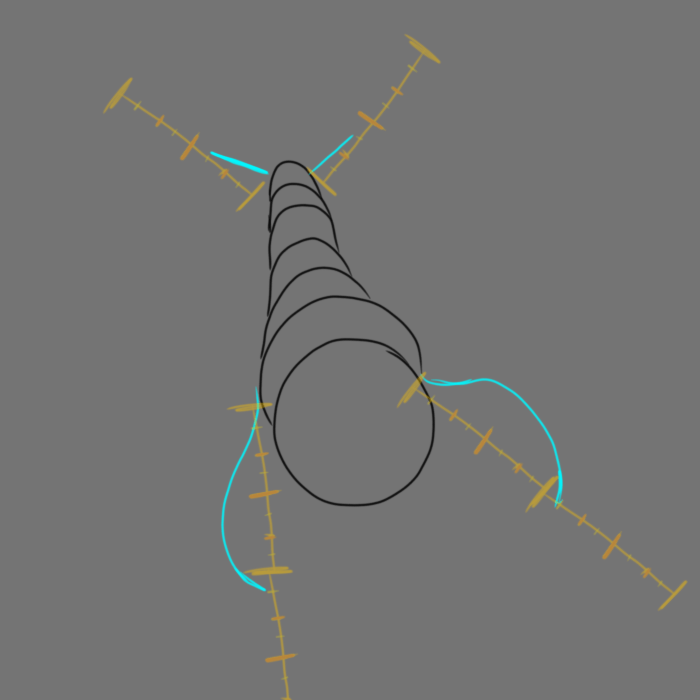
At an obtuse angle from one another on either side of the tip of the tail, draw two 3/8ths of a unit long lines.
At the base of the right side the bottom curve, draw a shallow S shape with a very small top and a very large bottom, 1 and 1/8th units long. Create a second, similar 1 and 1/8th unit long shallow S shape just above the base of the left hand side of the bottom curve.
Step 5:
On either side of the tail, Draw a line with a half circle dip in the center, extending slightly up and almost to the center of the tail.
Draw a pair of zig-zags from the tip of the both of the claws almost all the way back to the body but not quite.

Step 6:
Draw a sharp curve between the unconnected sides of the tail that almost reaches the base of the tail.
Draw a pair of shallow curves from the body almost that almost reach the tip of the claws.

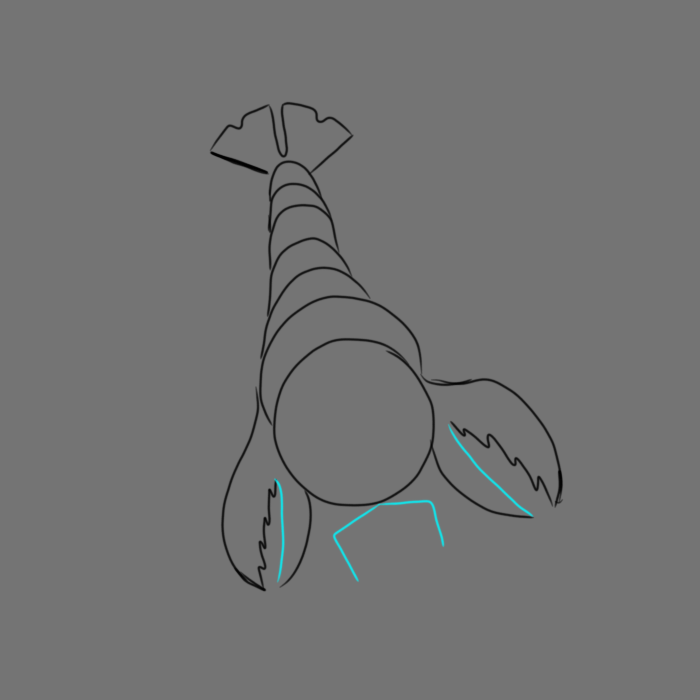
Step 7:
Draw a pair of lines from the tips of the zig-zags to the tips of the claws. At from a point at the bottom of the body, draw a pair of obtuse L shapes, making a fat pentagon with the bottom line missing.
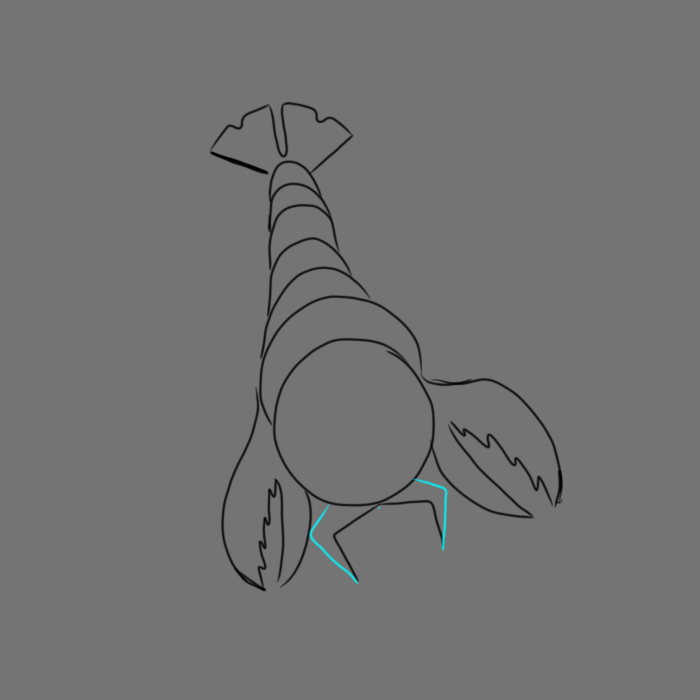
Step 8:
Draw two obtuse L shapes from the body (about halfway between the base of the claw and where the legs meet both each other and the body) to the tip of the legs.
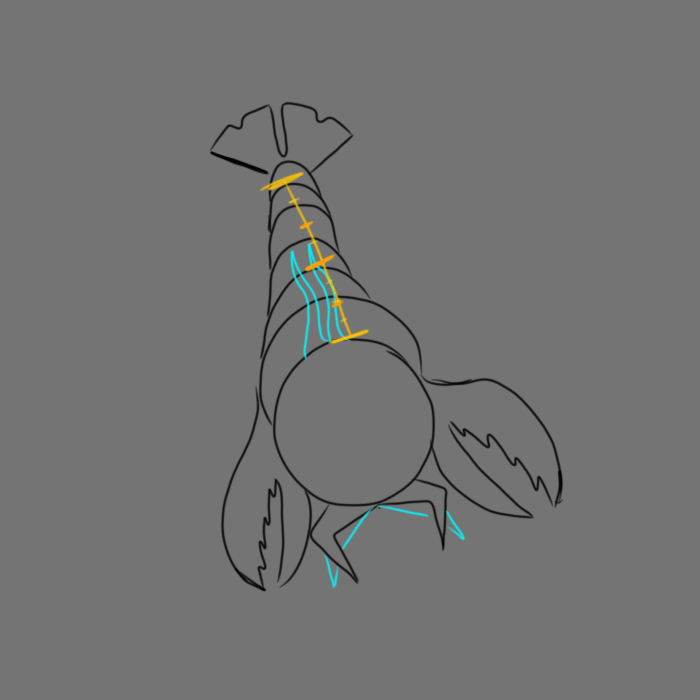
Step 9:
Draw lines from where the legs meet both each other and the body to just above halfway down the second segment of the legs. On the other side of the leg draw a V shape.
Draw two squiggly antennae 5/8ths of a unit tall.
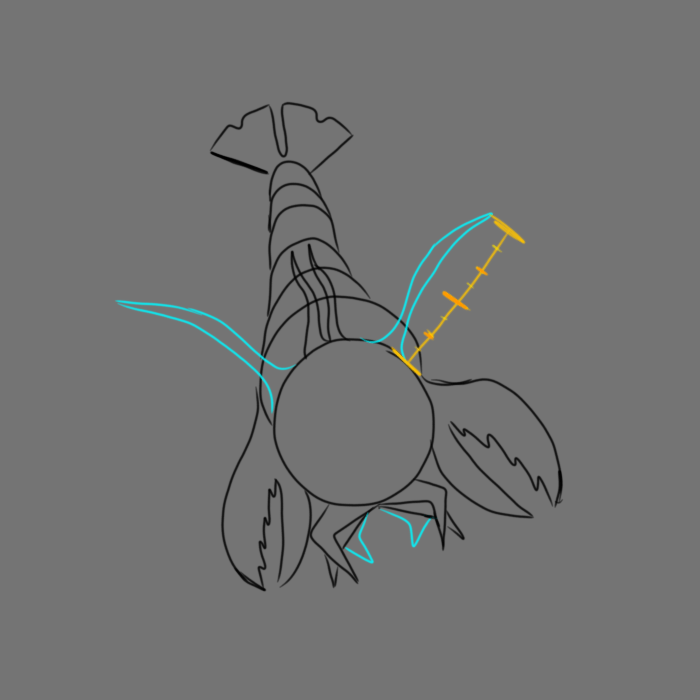
Step 10:
From where all the legs meet both each other and the body, draw two more obtuse angles that reach almost as far but not quite as far down as the other legs. Draw a line back up to just before the middle leg crosses the front leg on each side.
At an obtuse angle from one another, on either side of the antennae, draw a pair of feelers that are 1 unit long.
Step 11:
Erase anything inside the antennae and feelers, and connect the claws to the body.
Step 12:
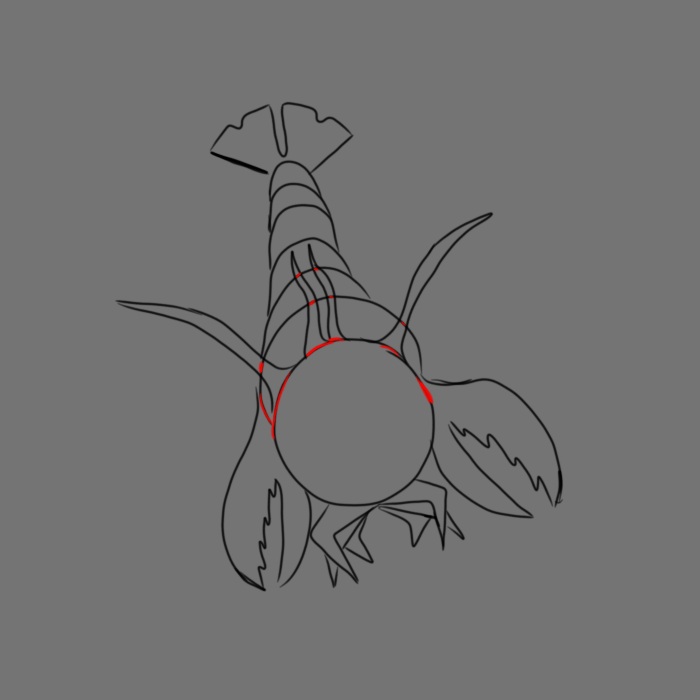
Erase the lines separating the legs from the body. Draw a W shape in the middle of the head and draw two V shapes above it. To make the eyes, draw two spoon shapes at the base of the antenna, and a circle inside the spoon.
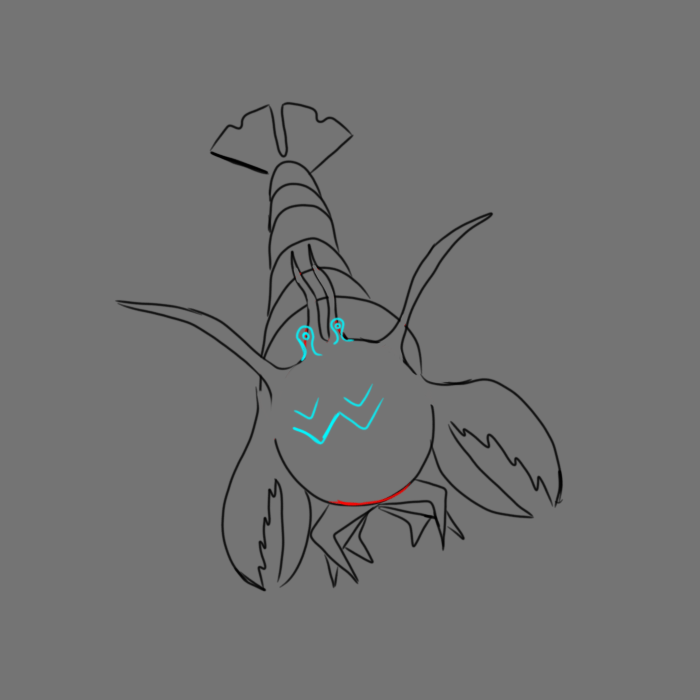
Step 13:
Create a curved cap for both of the mandibles. Underneath them, draw an oval for the mouth. Inside the tail, draw four lines, two on each side.

Step 14:
Color the yabby blue. Then add orangeish-brown sunburn spots on the parts of the yabby frequently exposed to the sun.
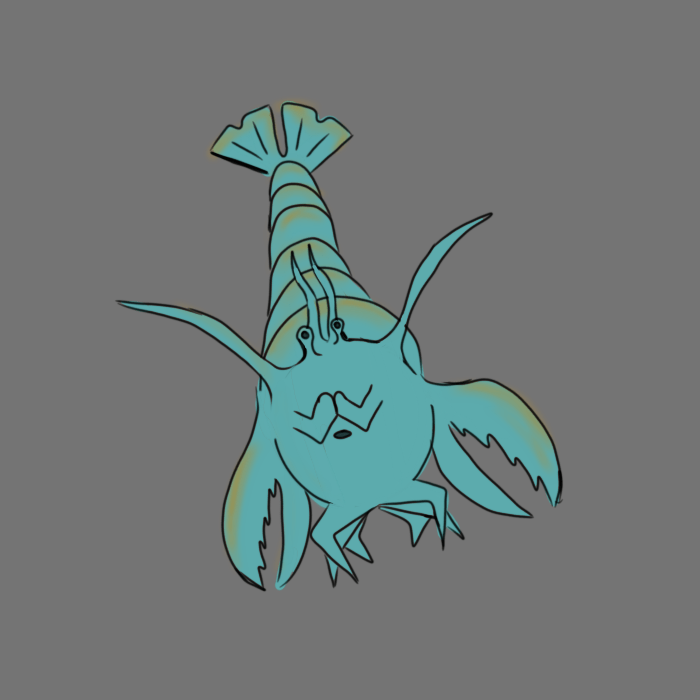
Step 15:
Add shading. Use yellow instead of white to lighten areas.

So that’s how you draw a Yabby!
The poem on this second-to last page probably went through the most revisions out of any of the poems. There are so many things that the poem could focus on. Ultimately I decided to make it about the color and migratory habits of the animal.
