
Next up is of course the Bombardier Beetle! The second animal in the book, this one was exciting to draw. It was new territory for me, I’d never really drawn a beetle before, even for etymology class, so I ended up looking at a whole truckload of reference photos as I designed this thing, as well relying on what I knew about beetle anatomy from college. Eventually I ended up with what’s here in the book. So, If you’d like a bombardier beetle of your own, let’s grab our drawing materials and get to it!
Step 1:
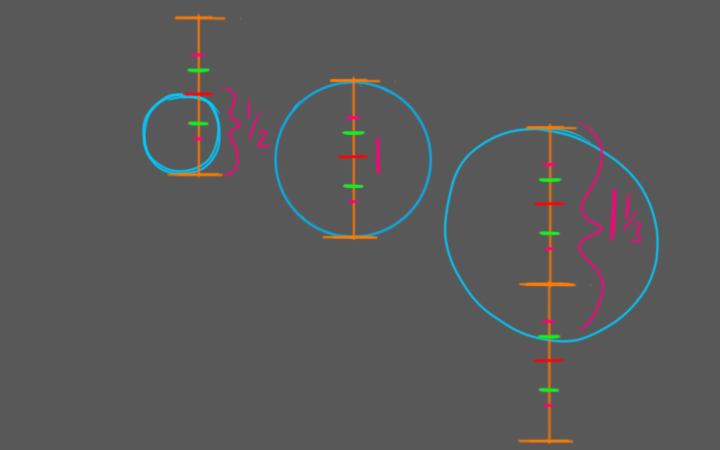
Much like we did for the Albatross, our first circle will be used to determine the sizes of the other parts of the creature, so make sure you know how big it is. Draw your first circle (it will be in the center, the chest). We’ll call the diameter of the circle one unit for the sake of clarity. I’ve divided the unit measuring stick into quarters and thirds: The green marks are thirds of a unit, the red and pink marks are half and quarter points respectively. Now beetles are insects, so we’ll need two more circles to complete the body. For the head, draw a 1/2 unit diameter circle so that the closest edge to the chest circle is about 1/3 unit away from it. Draw a 1 1/3 unit diameter circle a little bit away from the chest to form the abdomen.
Step 2:
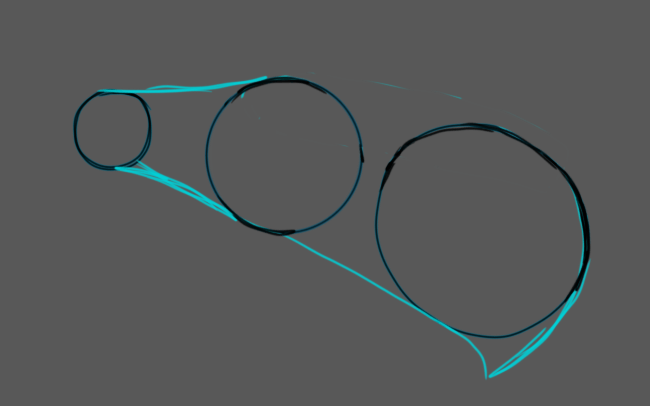
Next we’ll connect the head to the chest (also known as the thorax). We’ll also form the bottom of the abdomen by drawing a line between the thorax and abdomen, then curving it down to point vaguely in the direction that you want the creature to be shooting. Finish it off by drawing a curve to connect it to the rear circle. Don’t worry about making it aim exactly in the proper direction, the real beetle seems to fire at odd angles too. Here he’ll be firing between his legs, but the tip is pointed more down.
Step 3:
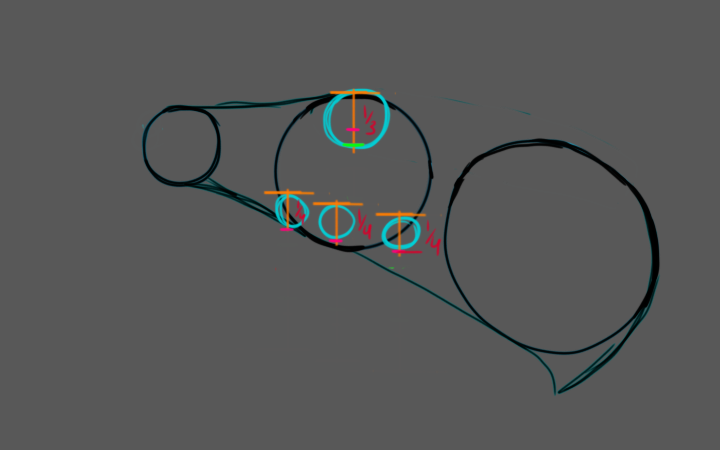
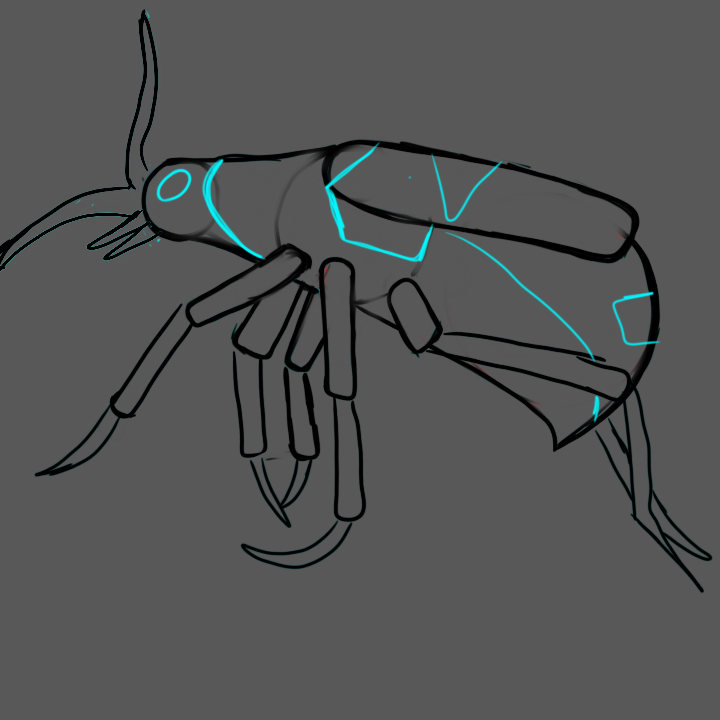
Next we’re going to add the points where the elytra (wing coverings) and legs appear. Draw a 1/3 unit diameter circle at the top of the circle, which is where the elytra will attach. Then, along the bottom of the chest draw three 1/4 diameter circles, one at the front, one in the middle, and one halfway off the back. These are where the legs attach.
Step 4:
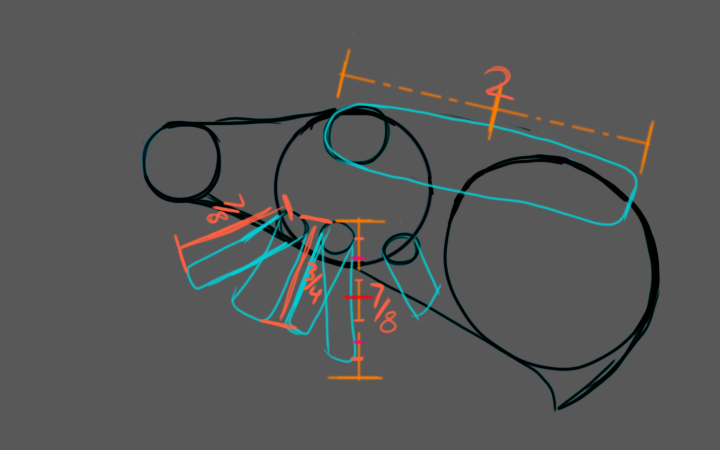
Now for the elytra and legs. For the elytra, we’ll draw lines extending 2 units (almost to the back of the abdomen) and then connect them at the back end like we’re making a curved rectangle. We’ll keep the curved shape of the circle at the front end. This “curvy rectangle” shape is called a obround.
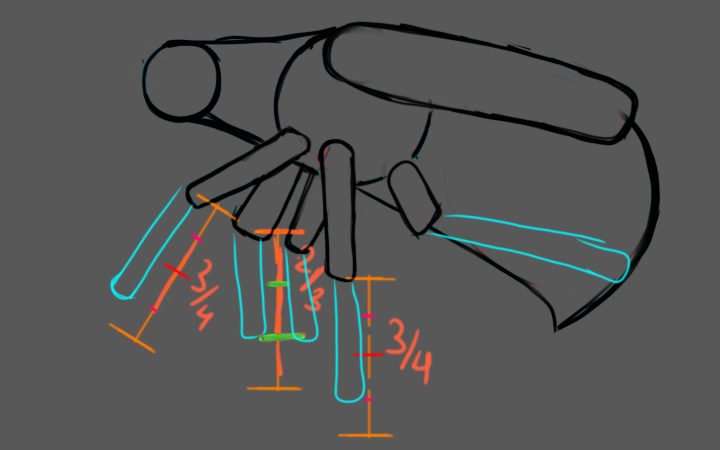
Next we’ll draw the legs on the side that faces us. The front two legs are obrounds that are 7/8ths of a unit long, and the rear leg is a 1/2 unit long.
For the legs facing away from you, make sure you can easily erase them, because they will eventually be partially covered with the spark. If you’re doing this digitally, put them on a lower layer. Make a 3/4 unit long obrounds for the far front two legs. Don’t worry about the far-rear leg, it’s behind the abdomen.
Step 5:
Let’s get those handy erasers, because we’ll have to do a little erasing here to keep things clear. Erase everything inside the legs and elytra, where the far legs would be behind the body, and the rear circle.
Step 6:
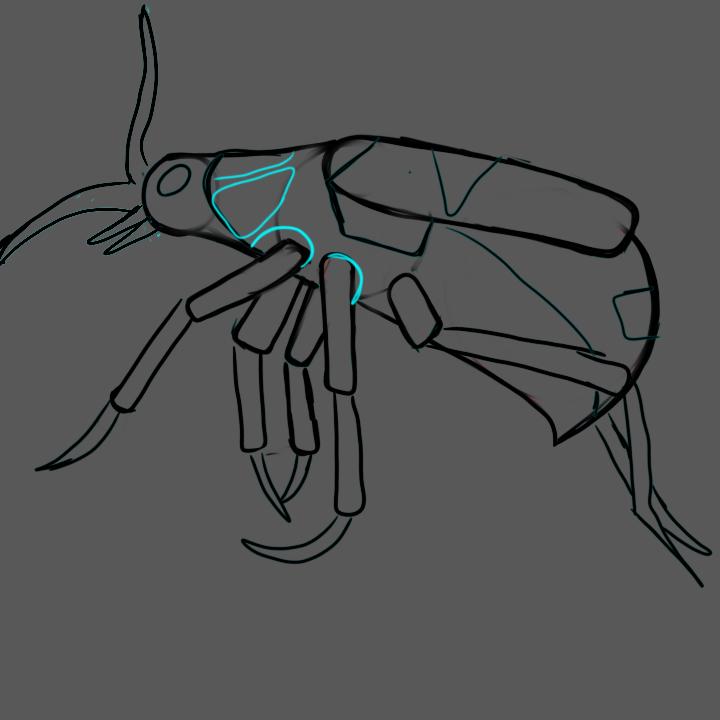
Next we’ll do the second section of the legs. They’ll be obrounds without one of the ends, but for the sake of brevity I’ll just call them obrounds. The near front two legs are 3/4 unit long obrounds, and the far legs are 2/3 unit long obrounds (again, make sure the far legs are either easily erased or on the other layer for later). Don’t bother trying to line anything in this step up with the top part of the legs exactly, as that slight misalignment helps it look more like a joint, just make sure it looks connected. For the rear leg draw an obround that reaches to the end of the abdomen.
Step 7:
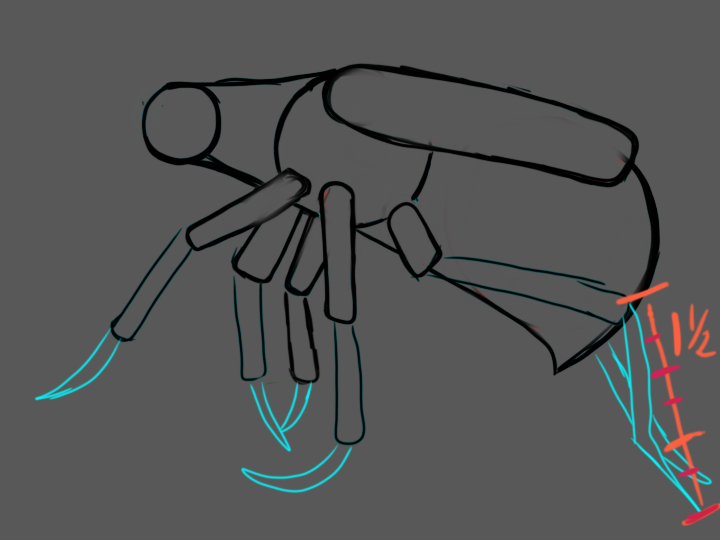
Now we draw the feet. You might have to play with this step a bit to get it to look the way you want it so don’t be afraid to erase these lines and redraw them a few times. The front four feet can change size a lot and still have it look right. Remember the far front feet will mostly be covered with the spark eventually so ditto what I said about the far legs earlier. For the front four feet draw curvy triangles approximately the length of the last joint at the end of each of the legs. For the rear feet, draw a 1 and 1/2 unit long jointed triangle with the joint at about 1 unit, and another curvy triangle of about the same length behind it at a different angle.
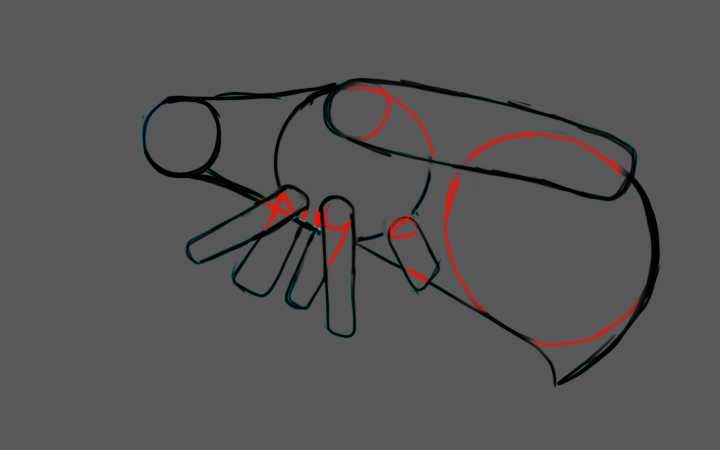
Step 8:
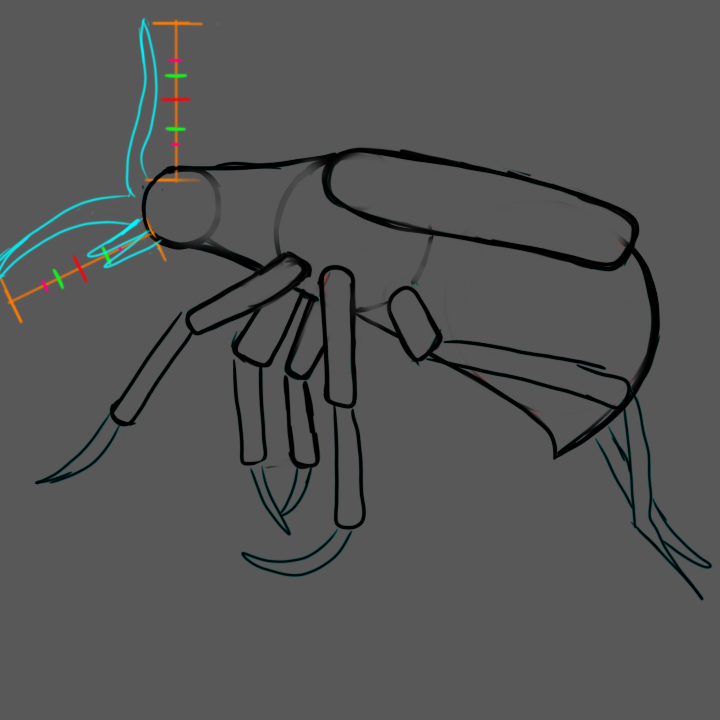
Now that the legs are done we can move on to the antenna and mandibles. From the front of the head draw two curvy triangles about 1 unit long. The mandibles are triangles a little more than 1/3 unit long at the bottom of the head.
Step 9:
Now we do the markings: The eye is an oval that takes up a little less than half the head.
To create the plate that covers the neck, we draw a curve just above the edge of the head going forwards and then back to the leg.
At the base of the elytra we draw a diagonal line to create a half circle space between it and the base of the elytra.
Beneath the base of the elytra we will draw a trapezoid, with the long end facing up and going between the base of the elytra and the edge of the chest circle.
Where the back of the trapezoid meets the elytra, draw a curved line from that point to a point somewhere between the back legs and the tip of the abdomen.
About halfway down the elytra, draw a triangle.
About halfway down the back of the abdomen, draw a square.
Step 10:
To continue the markings:
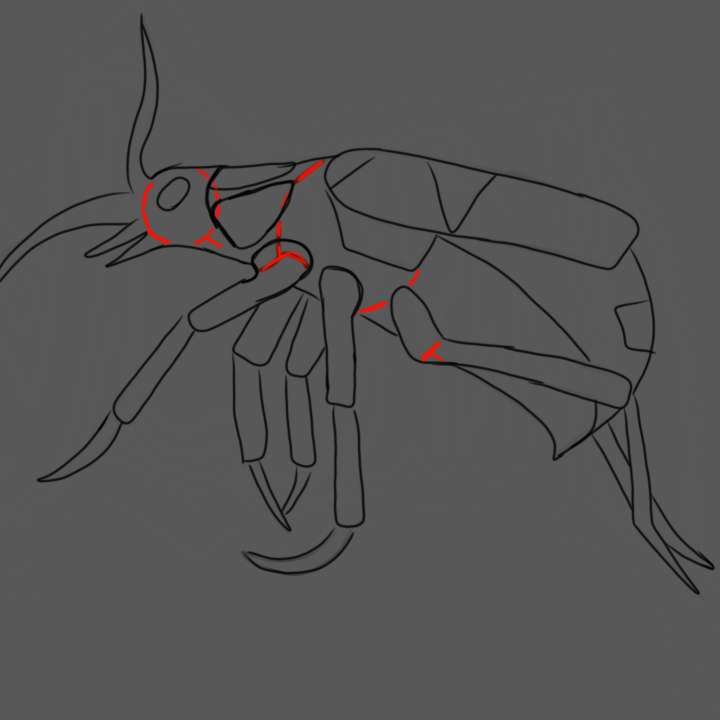
Fill the area between the neck and the chest circle with two rounded triangles.
Add a curve around the base of the front legs, to give them more of a socketed look.
Step 11:
Erase the remaining two original circles, and connect the legs to their bases. Clean up any messy or extra lines now.
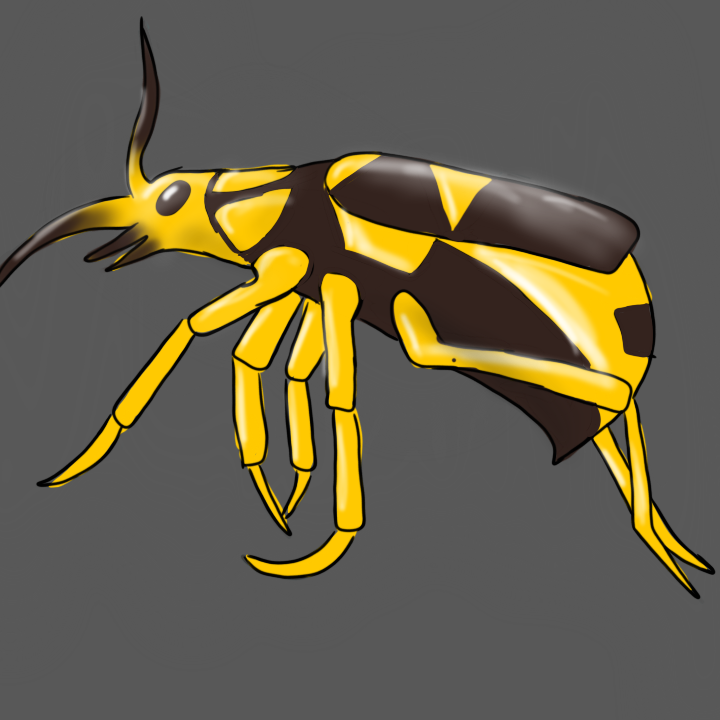
Step 12:
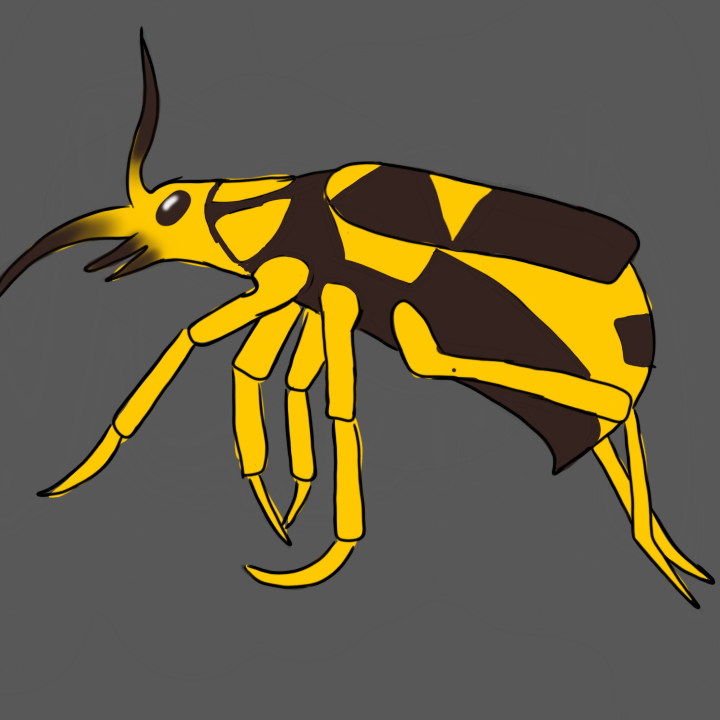
The bombardier beetle is black and yellow, so we’ll start coloring with yellow. The head, legs, rear, and shapes in the middle are all yellow. Remember to color the far legs either on the lower layer or in a way that can be erased, if you can’t do that with whatever you’re using to color with then hold off on coloring those two legs till after the spark has been drawn.

Step 13:
Next, we fill in the negative space and the little box at the rear with either very dark grey or dark brown. It’s a good Idea to add a little white reflection to the eye to avoid looking creepy.
Step 14:
Shading on a beetle is interesting, they are chitinous and waxy, so shadows are less important than highlights. So, we will be shading with white. Each of the yellow armor plates has a highlight on it, as well as the top of the elytra. Other than that shading is done as usual, just slightly favor lightening colors over darkening them.
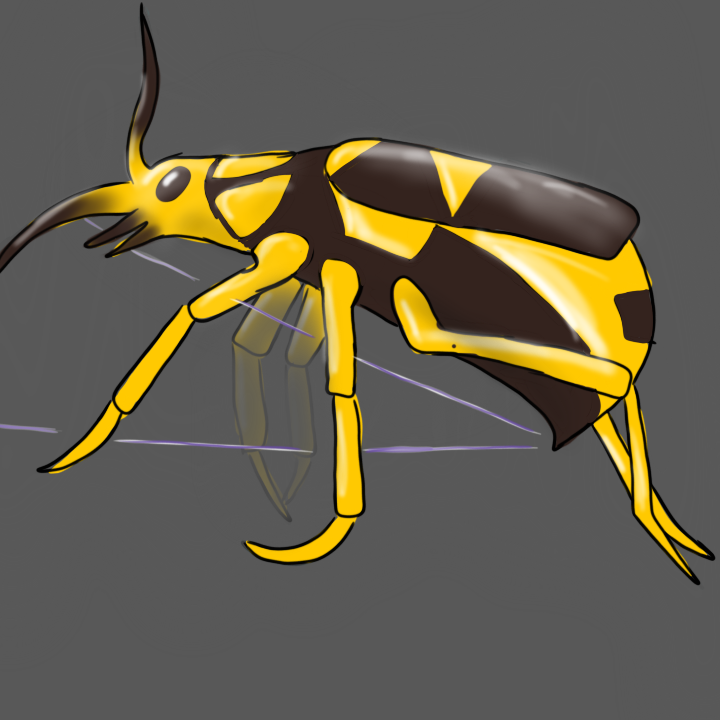
Step 15:
At this point we make the spark. Create a cone coming out from the abdomen and fade or partially erase the back legs into the background a bit. Depending on the background color either use white, or bluish grey for the spark. Do not use yellow even though that is the usual color one thinks of with sparks, the actual explosion is white colored and making it yellow makes it look like something much less cool.
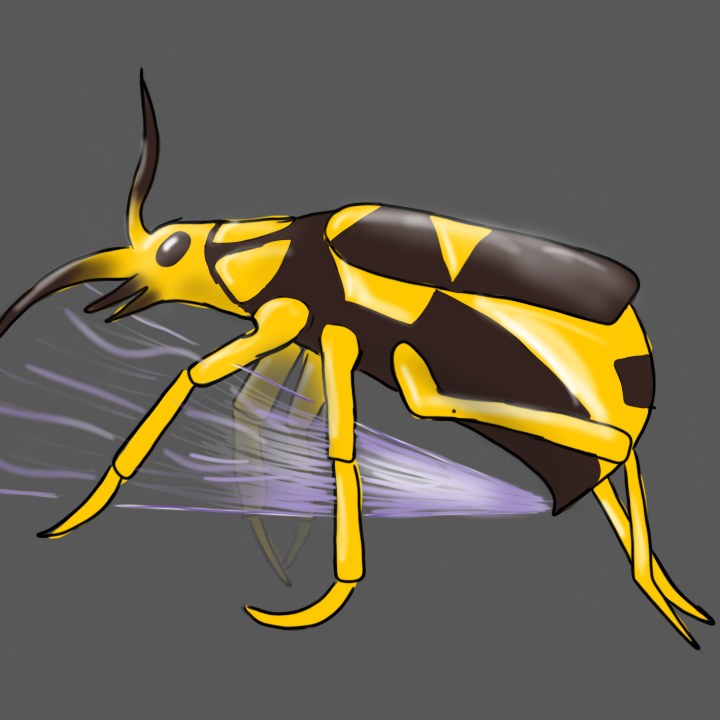
Step 16:
Finally fill in the cone with lines, more dense towards the tip and getting scarcer and less bright towards the front. To give a glowing aspect to the explosion make the center pure white and the edges a little darker. Near the front, add thicker, more transparent, wispier lines to create the feel of smoke.
So now you know how to draw your own little bombardier beetle!
The bombardier beetle seems to be one of my little cousin Kristy’s favorites from the book, mostly because it “fights the bad-guy ants!” and also because she can find the hidden letter B on the page despite not having officially been taught the alphabet yet (she was very proud of herself when she showed it to me last week). If you’d like a copy of the ABC book for your family or a little friend, check out the link below!
